Monday, March 7, 2011

{Made it Monday} Mini Cupcake Stands Tutorial

Happy Monday!

Since Mondays are a bit drab around here, I thought I'd blow some life and fun into mine by posting some of the random things I choose to waste my time on make.

Here's a little something about me you might not know.

I loooooooooove cupcakes.

There. I said it.

I know what you're thinking, but I don't love them the way most people do. I mean sure. I like to eat the occasional cupcake. (I'd rather have a big ole' piping hot bag of McDonald's french fries, but if that's not an option, mmm hmmm...I'll take a cupcake.)

I guess you could say I'm infatuated with cupcake images and paraphernalia.
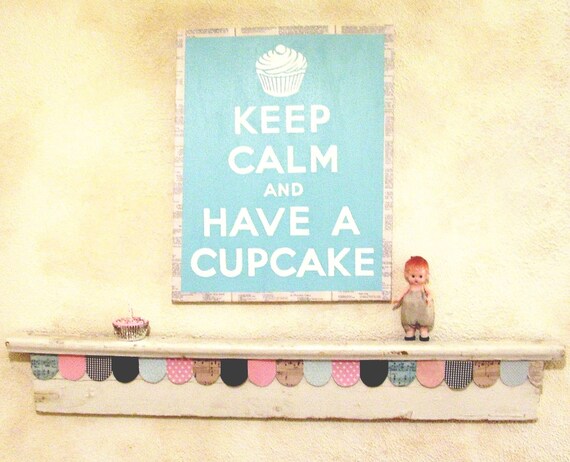


If it's got a cupcake on it, I'm probably going to have a second look and even buy it, if possible. If it has anything to do with cupcakes, it's probably going to be mine. I just can't help it.


So, when I saw these on Modern Moments, I knew I had to have some!
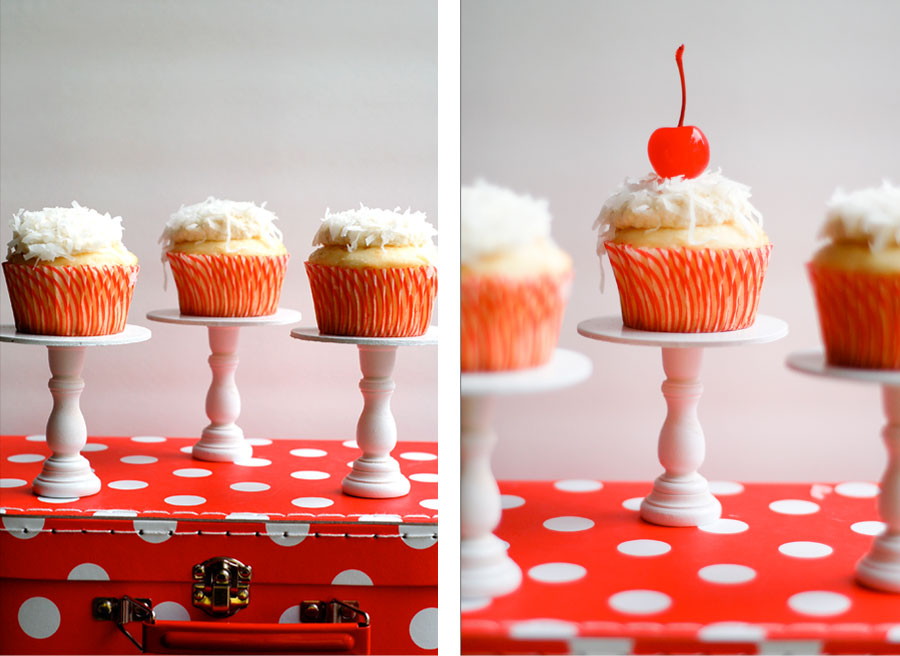


I followed her instructions and here's how it went down.

(First things first: Yes! My hands are really wrinkled (thanks for noticing). Yes! They've always been that way. YES! I've tried lotion - once or twelve times per day, EVERY DAY for 34 years. So, thanks for asking. You'd be surprised how many times my hands become the focus of conversations. Honestly, I'm just happy to have hands that work and create and give love. Moving on.)

I gathered my supplies. I picked up the round circle disks from Hobby Lobby and I ordered the candle sticks from The New Image Group. I couldn't find them around here, so I ordered them online.


I almost cracked these babies open without snapping a picture first. Oh, the horror!


I won't lie. The wood pieces are cheap. I'm okay with cheap. Actually, I LOVE cheap. But, cheap usually has a cost and the cost here was lots and Lots and LOTS of sanding. They were really rough and pretty jagged around the edges. See.


But, nothing a little sand paper and muscle couldn't take care of. (Did I just say "muscle?" Ha! That's funny. Especially coming from me. I think we all know the "muscle" required here is pretty minimum...this is MY blog, remember?)


Anyway, once I had them sanded down, I painted them with white acrylic paint and a foam brush. (Hiiiiiiii, Mr. Turkey! Isn't he cute??)


I painted the pieces with two coats of paint and then had to sand them all again. I told you: Cheap has a cost.

Once they were dry and sanded (and sanded again and then painted again - twice), they were ready to be glued together. Whew!

Lucky me! I have a hubs who can fix anything. He just happened to have this wood glue that I used.


Once glued, I added some weight to the top and let them dry. (Use whatever you have. I was working at my kitchen counter, so all of our medicine bottles became weights.)


I let them dry overnight, but a few hours is probably good enough.

Once they were ready for use, I baked up some pretty cupcakes and we were ready for action!


I didn't have a really cute red and white polka dot suitcase to use as a prop like she did, but I did have a cute little cherry!


So, thats it! Hope you are inspired to make some mini cupcake stands of your own! If you do, come back and link me up, so I can leave you some love!

Hugs everybody!

Keep Calm and Have a Cupcake Print from jennysbakeshop.
Keep Calm and Have a Cupcake Journal from Peter Pauper Press.

Tuesday, March 1, 2011

{Trendy Tuesday} Oh! How Pinteresting!

Here's a little piece of internet heaven for your Trendy Tuesday morning.

Pinterest.

It takes up most of my free time these days. ('Cause you know, I have sooooo much free time.)

Have you seen it?


According to the owner's description, Pinterest is "a virtual pinboard — a place where you can create collections of things you love and "follow" collections created by people with great taste. People use Pinterest to collect and share all sorts of things -- wedding inspiration, favorite T-shirts, DJ equipment. You name it, people are pinning it."

Essentially, It's like having a pinboard right in front of me without the need to - oh, you know - BUY A PINBOARD and pesky pushpins. It allows me to visually bookmark items I find online and catalog them in a way that's inspiring to me.

You can also "follow" other Pinterest users. Once you follow someone new, you can see their boards and pins - items they find interesting online. Each new and intriguing pin leads you to more beautiful discoveries. Just be warned...it's incredibly easy to get sucked in to this fascinating site (much like Alice and the rabbit hole, no?)

Seriously. I can't get enough. I feel so artistically inspired (or what I also call *artsy fartsy*) while I'm browsing around the site, pinning things left and right.

It. Is. Awesome. (Of course, I'm artsy fartsy like that.)

I have pinboards full of beautiful doilies, dreamy craft rooms, cute kid food, projects I want to make, items I want to buy, party ideas, felt-a-licious finds, etc. etc.

All my favorite things!

So now. Don't say I never gave you anything.

I just gave you a whole new online world to waste your day browsing around. (And, you're going to love it, by the way.)

Youareverywelcomeandthatisall.

To see my little world of Pinterests, just visit my boards or my pins.

Monday, February 28, 2011

My Creative Gift {for a crafty friend}


I have a crafty friend.

Actually, I have a few.

But one in particular had a birthday last week and I wanted to make it special. I wanted something that would make her smile and charm her socks off. I wanted something she would LOVE! I wanted to give her something she could use again and again and again.

The problem?

Her craft room is like a mini-Michael's. She has it all. I could've walked into Michael's or Hobby Lobby and picked up anything on any craft or tool shelf and chances are, she probably has it. {Let's face it, Sof... it's true!!}

So, what's a girl to do?

Get creative! (Oh, and raid Etsy.) That's what.

If you've never seen Etsy before, then WHEREOHWHEREHAVEYOUBEEN? It is like a playground for hand-made crafty fools like me! A wonderland, by all accounts.

I've had a long list of favorites on Etsy for a sweet forever. So, I just hopped over, found a few unique and original items and ordered up a few savory goodies! In just a few short days, sweet little hand-made items starting arriving in my mailbox from all over the world! (In fact, I'm still waiting on one or two to arrive any day).

Opening each of those packages was almost more fun than putting the final gift together!

Here's how the gift turned out:


Pretty cute, if I do say so myself!

Here are a few of the things I purchased from Etsy and from my favorite craft and scrapbooking stores (click on images to view larger).


I also added a few more items after this picture was taken. I had the packages all scattered around my house and it took me a few tries to remember where I stored all the fun goodies! (Note to self: keep the packages together next time!!)

Once I *found* the gifts, I wrapped each item individually and stuffed them into the box. It was like 10 tiny presents in one! Yay for fun gifts!


Please forgive me as I shamelessly show off all the cute packaging of the gifties.
(Psssst: If "cute" isn't your thing, you can just skip on over to the next blog. It won't hurt my feelings at all.)

A container full of felt circles.


A sweet little envelope for the tiny paper doilies.


Cute decorations for the top of the washi tape.


A non-bendable package for the 6 inch doilies (taped up with cute washi tape).


A tiny bag for the metal tags adorned with flower and bling.


Gift tags reworked to display twine.


Chic printed twill ribbon on my favorite clothes pins.


Said twill ribbon used to tie up the packaging on the kraft stickers.


Jazzed-up small ziplocks to hold the flowers and bottlecaps.


I used a few of the items in the gift to make a tag to attach to the front of the gable box.


And, that was it! I attached the tag to the wired pom pom trim and off it went! To a loving home with my friend, Sophie!


Hopefully she'll love these items as much as I love her! (And she'll forgive me for telling the world wide web that she has a mini-Michael's in her home.)

And, because I always get lots of questions about what's what and where to buy, here is some info on the items I used:
Digital frame by Fee Jardine at Sweet Shoppe Designs
Bazzill Cardstock Paper (pink dotted) and printed twill ribbon from Scrapbook Creations
Happy Birthday paper from Hobby Lobby
Twine by Divine Twine
Washi tape, kraft stickers, big doilies, wooden tags, mini pom pom wired ribbon by sugarbsupplies on Etsy
Felt circles created by me using Cuttlebug
Tiny paper doilies by Greatest View on Etsy
Gable box from If It's Paper (now out of business) :(
Metal tags, tiny flowers and jewels from Hobby Lobby and Michael's

I'm linking this project to:
Tip Junkie handmade projects

Sunday, February 13, 2011

Valentine's {Wrapped Up}

So, this is it!

VDay is tomorrow! I sure hope you're ready!

Here are the treats I made for the kids' classmates.


Yes. I know. I like to call them "A whole heap o' sugah on a stick." Or Valentine Gummy Wands. Either one.

It's a good thing they're cute, because let me tell you one little thing about these treats.

1. They are messy to make.

There. I said it. They're messy. They're a pain, really. But, they are SO. VERY. CUTE! Cuteness has a price, right?


Yes. That's the leftover sugar. If that scares you, just find another cute thing to make. These will not be your friend.

I decided to test mine out last week - something I *never* do. I'm a fly-by-the-seat-of-my-pants kinda girl, but these gave me a little case of nerves, so I did a trial run last week and then the marathon today.

Here's how I made mine:

I cleared my kitchen table and pulled out all the sugary goodies.

Last week.


Today.


I found some items worked better than others. The strawberry heart-shaped marshmallows, for example, were a hot mess on the stick. Just not good. They tore as they slid on and just made a big ole mess. So, I axed those after the first go.

I added peach rings because I thought the whole thing could use some yellow?!? Call me crazy. (You won't be the first.)

It's all up to you what color scheme you decide to use. I went with colorful, because...well...that's me. (Did you see the yellow kitchen? Okay then.)

They are a bit time consuming, too. I made an assembly line.

Wait. No. I don't think one person can qualify as an assembly line.

I guess what I did was make mine in shifts.

I skewered each one individually and stuffed them into the baggies one at a time.


Then I tied the tags on.


After that, I stuck them all in buckets and called it an afternoon.


See the time on the stove?? 4:26pm.

I was DONE with Valentine's Day treats before 5 o'clock the night before Valentine's Day! That's what I like to call a miracle, people! Indeed.

I hope your Valentine's Day turns out to be just wonderful.

And sweet.

Thursday, February 10, 2011

Love Day Treats

So here are a few cute ways to package your special Valentine's Day treats.

How about a tin with a little tag?

Let's just stop right here. I need to tell you something. Something really important. Really, REALLY important.

Are you with me?

Okay, here goes. I always buy these tins when I see them on the Target dollar aisle. Any color, all colors. I buy them. I don't care if I don't have ONE. SINGLE. THING. planned for them. I buy them. I don't care if the next holiday is months away. I buy them. I don't even care if I already have 2 or 20 sitting at home in my closet just waiting to be used (*ahem* - not that I have 23 waiting in my closet to be used), I buy them. You can put just about anything in there and make it cute! Seriously, ANY. THING. Trust me. When you see these next time, you're going to want to buy them. Just wait.

Okay, back to the task at hand.

So, I made this tag with the Affectionately Tagged set by Kaye Winiecki. The tags are already made! Again, just print, cut and attach. E.A.S.Y.


Here are more of the tags (in boyish versions). I used a gift bag from Michael's and tied the tag on with twine (my new totally favorite decorating item). LOVE!


Next up, a candle. A candle is a great gift. Sure, you could just leave it as-is, but why would you want to? I think it's much cuter to tie a tag on that says "Scent with love." Come on. You know that's cute! Just look at that little skunk fella! PRECIOUS! The tag only takes an extra two minutes and totally changes the cute factor of the gift!


Here's an easy idea: dump some sour worms in a cellophane bag and add a note that says "PUCKER UP!" Holy cuteness, batman! I printed off tags from the Stinkin' Cute Valentine's Set, punched a hole, threaded a ribbon through and off she goes!


I told you, I have a "thing" for cuteness. I can't help it. It's in my blood.

Now, go. Make something cute!

I have a few more ideas up my sleeve coming tomorrow, so stay tuned!

Tuesday, February 8, 2011

Valentine fun!!

I'm just going to skip the apologies. They aren't needed and they're a bit boring.

I'm here to show you a few fun ideas for Valentine's Day!

I looooooove Valentine's Day. In our house, it's almost like Christmas, without the chaos.

This year, I am going to do a cute breakfast for the kids with these fun milk glasses. Dunkin Donuts has cute little heart-shaped donuts with sprinkles that I plan to use as well (hey - no judgements - it's a school morning and we gotta stay on schedule).


I bought the straws from The Sugar Diva and I big puffy heart love them! They are so festive. Seriously...who *wouldn't* want to drink with those straws?!?

I printed the tags using Stinkin' Cute Valentines by Val Wibbens. They were so easy peasy. Print, cut, attach. Doesn't get much easier than that! If you've ever thought about trying hybrid scrapbooking, this would easily be the place to start!


The kit has everything you need for Valentine's gifting!


Next up: teacher gifts.
I'm soooooo proud of myself for finishing these up early this year!

But, don't be fooled. I actually wanted to give these gifts in January and never got them packaged up. Oops. I guess they make a pretty good Valentine's treat, so I'm good with that!

One of my sweet students gave me a gift like this for Christmas and I loved it so much, I decided to replicate it (with a dash of "Leigh" thrown in). Pardon the empty glass apothcary jars. When I took the photos last week, they were still pretty bare. They are full of Valentine goodies now, though. Hmmm...maybe that needs a post all on it's own.


Anywho, here's what you need (click the picture to view it larger):


That cute little hibachi grill came from a restaurant store on the internet. I simply googled "mini hibachi grill" and searched through the images until I found what I was looking for. The grills cost about $8 or $9 each and are soooooo cute!


I added a cute tag and label using Wild About You and now they're ready!


Can I please just say that I've never, in my entire life, completed a task BEFORE the deadline?!?!? I mean really.

I'm pretty proud.

I digress.

That's it for tonight. I have a few more ideas and treats and I'll post those tomorrow. For now, it's bed time and I'm ready to hit the sack!

Happy Valentine's-ing!